Why Your Mushroom Grow Kit Stopped Growing (and How to Fix It Fast)
Is your mushroom grow kit stalled or molding? Learn how to rescue it with better humidity, airflow, and care. Fix cracked caps, leggy stems, and contamination the easy way—plus tips to get 2–3 extra flushes from one kit.
GROWING
12/4/20255 min read
🍄 Mushroom Grow Kit Not Growing? Here’s How to Fix It (Humidity, Airflow & More)
Struggling with a mushroom grow kit that looked great for a week, then just… stopped? You’re not alone. Almost every new grower hits that same “did I kill it?” moment.
The good news: your kit isn’t dead yet.
With a few simple tweaks to humidity, airflow, and setup, you can usually bring a stalled kit back to life — and even get two or three harvests instead of one.
In this guide, I’ll walk you through everything you need to know to fix a failed mushroom kit, prevent common mistakes, and understand what your mushrooms are trying to tell you.
🧠 Why Mushroom Grow Kits Stop Growing
If your kit seemed fine for a few days and then stalled, the block itself is usually healthy — it just doesn’t have the environment mushrooms need.
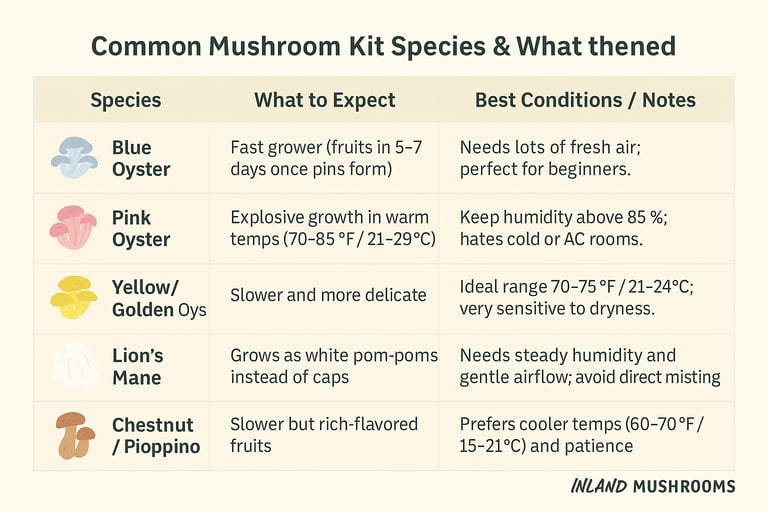
🍄 Not All Kits Are the Same
Every kit looks similar on the outside, but what’s inside can be totally different. Some need to be soaked before fruiting, others are ready right out of the box.
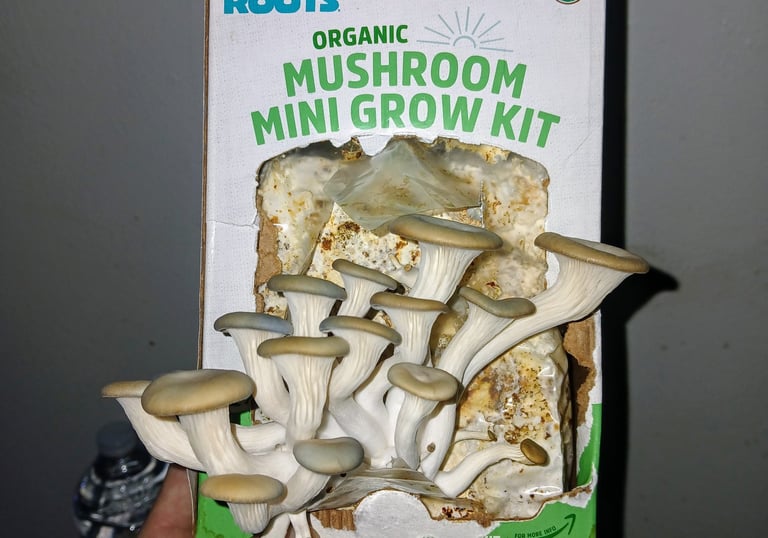
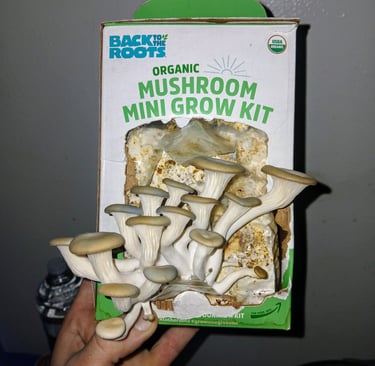
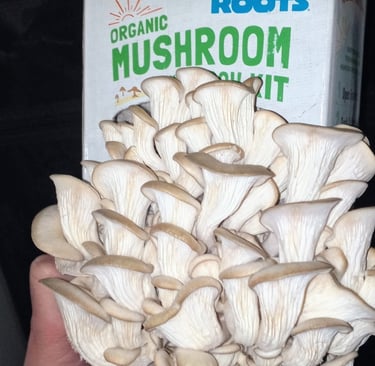
Pre-Soak Kits (like Back to the Roots Oyster)
Arrive dry to extend shelf life.
Must be soaked for 8–12 hours before cutting the window open.
Without the soak, the mycelium stays dormant and you’ll get weak or zero pinning.
💡 Use cool, clean water and let the block drain fully before fruiting.
Ready-to-Fruit Blocks (often from Etsy or IG growers)
Arrive fully colonized and still moist.
Need humidity and airflow, not soaking.
💡 Mist 2–3× per day and keep near a humidifier or tote setup.
Different Species, Different Needs
💡 Always read your kit’s instructions — some need soaking, some don’t, but all need humidity, air, and light.
💧 Low Humidity — The #1 Kit Killer
Mushrooms evolved to grow in damp forests, not dry living rooms.
How to tell your kit is too dry:
Surface looks chalky or dull instead of shiny.
Pins shrivel before they form.
Caps crack or wrinkle.
Quick fix: Mist two to three times per day, but that’s only a short-term patch.
Better fix:
Place a small cool-mist humidifier nearby, pointing upward so the mist drifts past the kit.
Or set the kit on a rack above a shallow tray of water to trap moisture.
💡 You want “morning-dew moisture” tiny droplets, not puddles.
If your kit keeps drying out or cracking, I’ve got a full post on fixing that, including how to use a humidifier the right way. You can read it here.
💨 Stale Air — Mushrooms Need to Breathe
Mushrooms breathe oxygen and release CO₂ — the opposite of plants. When CO₂ builds up, you’ll see tall skinny stems with tiny caps bending toward light or cracks in the bag.
Fix it:
Run a fan on low in the room (not aimed directly at the kit).
Or keep it near a cracked window for gentle airflow.
If it’s still inside the bag, poke a few holes near the top for air exchange.
💡 Once air starts moving, mushrooms grow thicker, straighter, and happier.
🌡️ Temperature & Light
Most gourmet species fruit best between 65 – 75 °F (18 – 24 °C).
Avoid direct sunlight and heater vents.
If it’s cold, move the kit to a bathroom or closet that holds warmth.
Light acts as their compass, not fuel. Give them indirect daylight or a small LED 12 hours/day.
💡 If your mushrooms are curling sideways, they’re chasing the light.
🧱 Old or Damaged Kits
Sometimes it’s not you — it’s the kit. If it smells sour or shows green or black spots before you even start, contact the seller. Healthy blocks smell like fresh mushrooms or wet soil.
✅ Recap:
Most problems trace back to dry air, stale air, or temperature swings.
Fix those and you’ll usually see new pins within a few days.
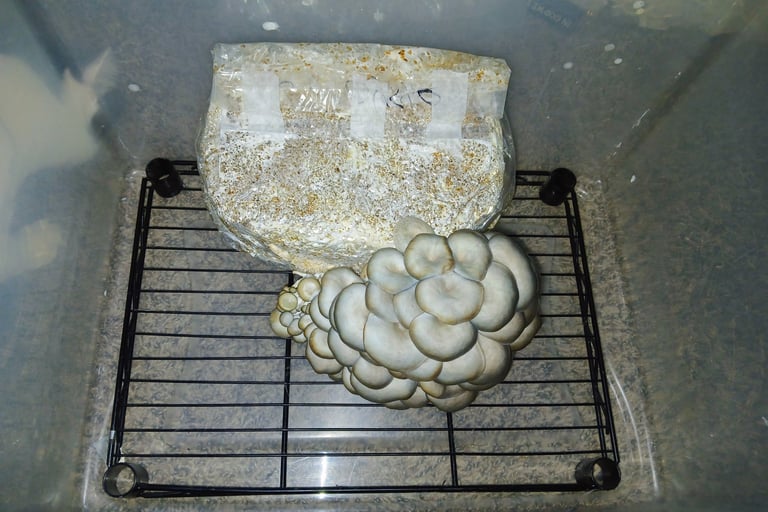
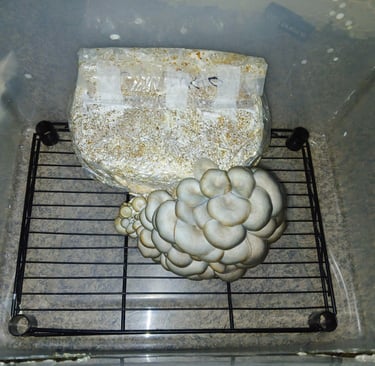
🪣 Build a Simple Fruiting Chamber
Once you understand how to balance humidity and airflow, a tote can help — but only if it’s built to breathe. Think of it as a humidity box, not a sealed chamber. The holes alone won’t create airflow; you’ll still need good room circulation or a small fan nearby to keep CO₂ from building up.
You’ll need:
1 clear plastic tote (6–12 qt)
Drill or screwdriver
Polyfill or micropore tape
Small rack or jar lids to lift the kit
Spray bottle
(Optional) Damp perlite on bottom for extra humidity
How to build it:
Drill six holes total — two on each long side, one on each end.
Fill holes with polyfill or tape.
Set the kit on the rack inside the tote.
Mist the walls until foggy (not dripping).
Keep the lid clear so light reaches inside.
💡 Think “mini greenhouse,” not airtight box.
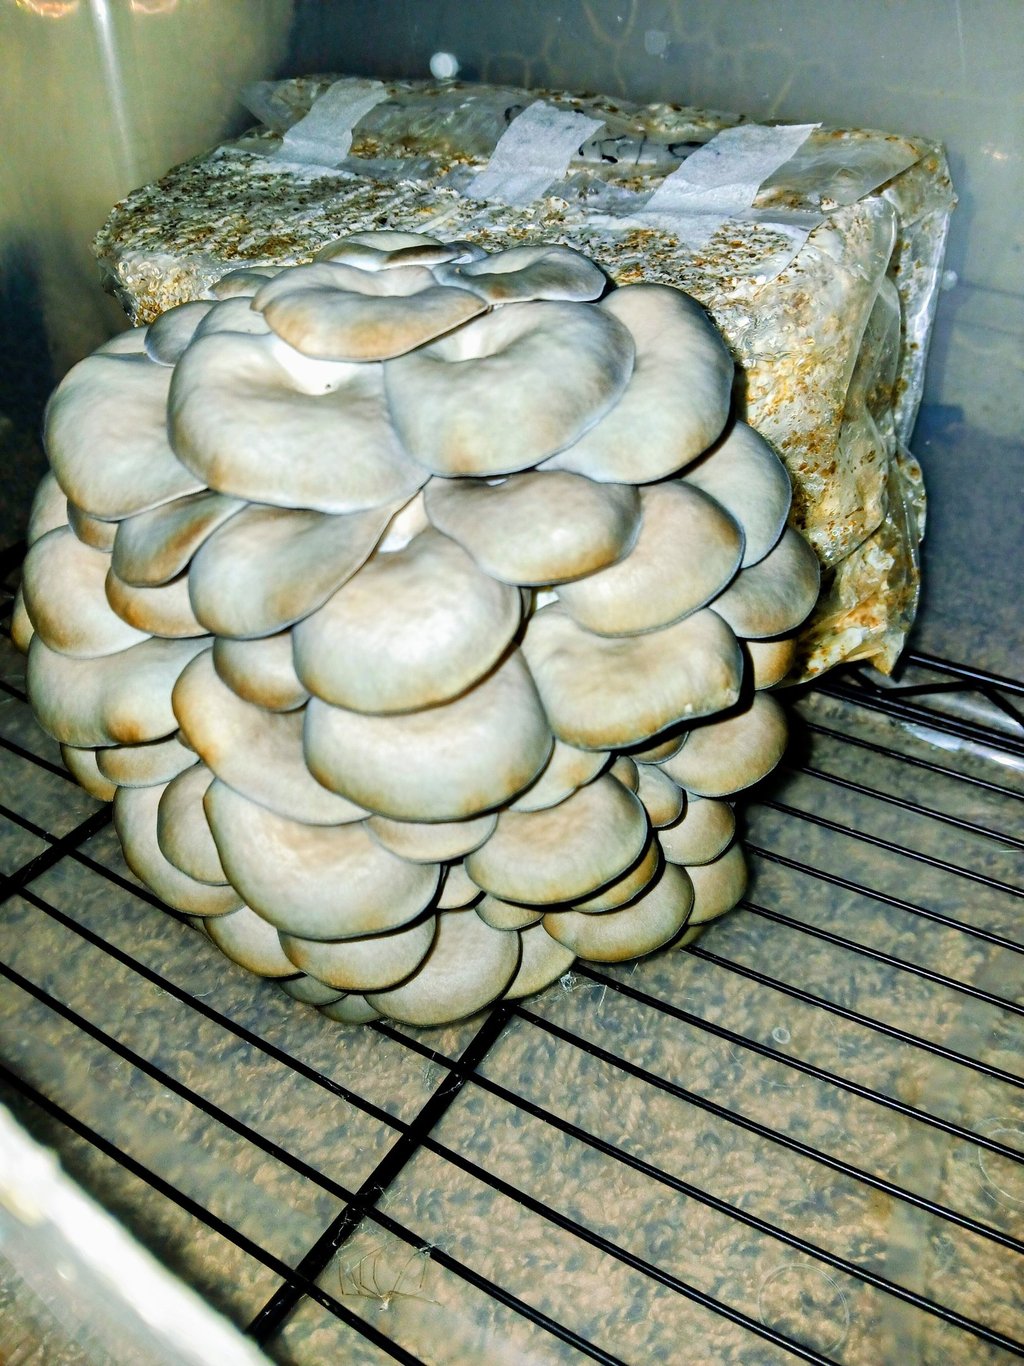
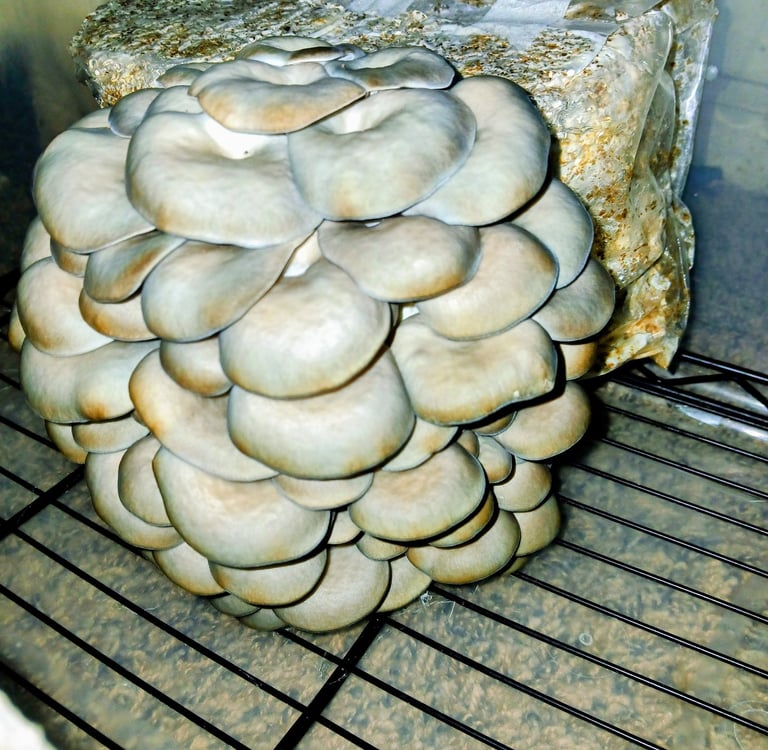
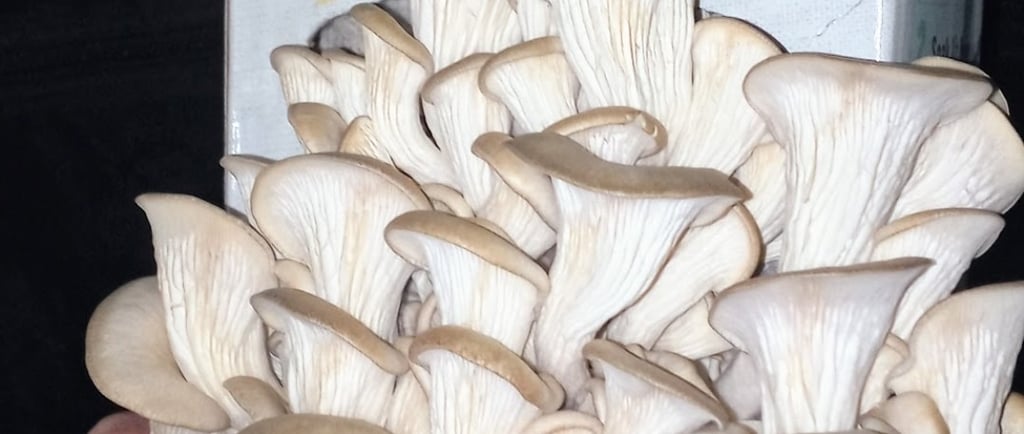
♻️ Getting More Flushes from One Kit
After your first harvest, don’t toss the block — it can fruit again!
Rehydrate it:
Submerge the block in cool water for 6–12 hours.
Drain for 30 minutes.
Return it to your fruiting chamber.
You can usually get 2–3 flushes, each a little smaller than the last.
💡 If it smells sour or turns slimy, compost it — otherwise it’ll bounce back fast.
Want to see exactly what a healthy second and third flush look like, plus how to know when your block is done? Check out my full guide on getting multiple mushroom flushes here.
⚠️ Troubleshooting: Stalled, Moldy, or Weird Kits
😴 Stalled Out
If your block looks healthy but hasn’t pinned in 2+ weeks:
Rehydrate for 6–8 hours.
Let it rest a couple days in a cool spot.
Then return to humid conditions.
Sometimes it just needs that reset.
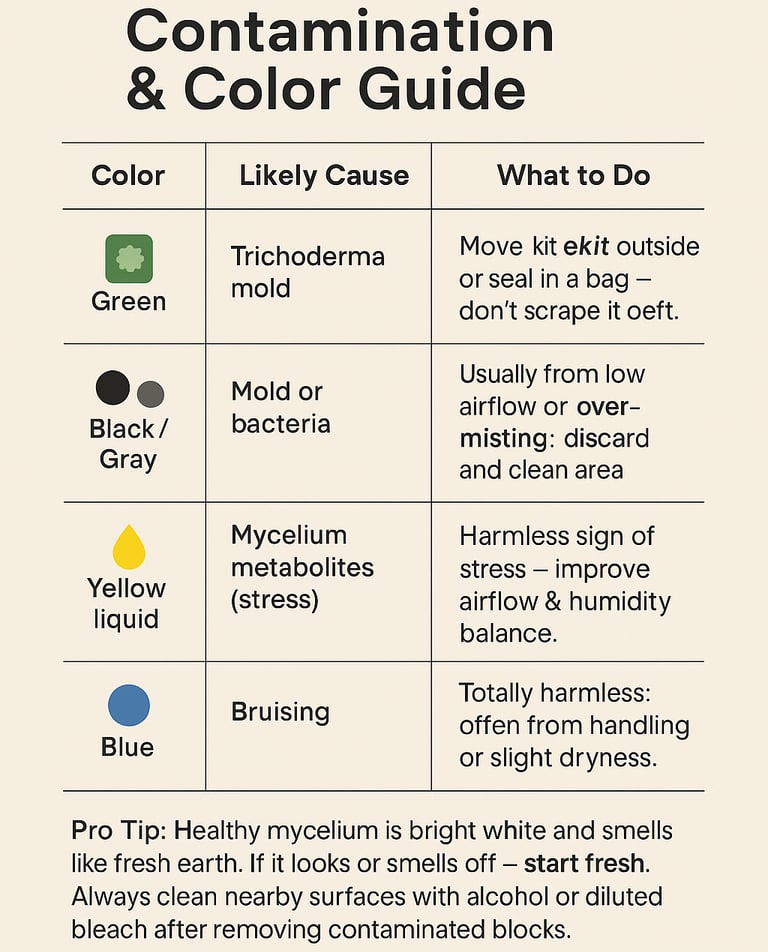
🦠 Contamination
Even when you do everything right, some kits still go sideways. It’s part of mushroom growing. The key is knowing what you’re looking at — whether it’s harmless bruising or real contamination that needs to go. Here’s a quick reference to help you tell the difference before deciding whether to rescue or retire your block:
🌱 Bonus Tip: Outdoor Burial Trick
Even a “failed” kit can surprise you.
Bury it under 1–2 inches of mulch or straw in a shaded corner of your yard, water occasionally, and you might get a bonus flush in a few weeks.
Having trouble getting your kit to fruit again? Check out my new guide, “Rescuing Your Mushroom Grow Kit,” a simple step-by-step ebook that shows you how to revive stalled or dried-out kits and get multiple flushes.
🔗 What to Do Next
If you’ve fixed your kit and got mushrooms again, congrats — you just learned the real basics of cultivation: humidity, airflow, and patience.
💬 Final Word:
Once you see how easy it is to rescue a kit and get multiple harvests, you’ll never look at store kits the same way again. Mushrooms are resilient — and now you know how to give them what they need.